

Tạo file IMG Window bằng VM VirtualBox
VPS linode, Digital ocean để tạo được vps windows thì anh em cần phải có file custom windows có đuôi gz, nếu không muốn tự mình tạo thì bạn có thể dùng các file windows.gz đã chia sẽ ở cuối bài:
- Windows đã được mình cấu hình remote và cài sẵn vài phần mềm cơ bản như: Google Chorme, Notepad++, Winrar, IDM.
- Windows được tải từ microsoft và hoàn toàn sạch sẽ chứ không có em bé nhé
Chuẩn bị
– Download VM VirtualBox: dùng để tạo máy ảo cài đặt windows
– 7 Zip: Dùng để nén file thành định dạng gzip.
– Tải file iso windows gốc: https://hoanggiangnam.com/tong-hop-download-link-iso-windows/
– File ISO driver virtio-win-0.1.225.iso: https://fedorapeople.org/groups/virt/virtio-win/direct-downloads/archive-virtio/virtio-win-0.1.225-2/virtio-win-0.1.225.iso
Bạn cũng có thể chọn phiên bản driver khác tại link này: https://fedorapeople.org/groups/virt/virtio-win/direct-downloads/archive-virtio/
Video hướng dẫn:
Cách làm:
Bước 1: tải các mục chuẩn bị ở trên và cài đặt VM VirtualBox + 7zip
Bước 2: mở VM VirtualBox lên và tạo mới máy ảo >> đặt tên máy ảo >> chọn nơi lưu >> dung lượng ram >> Hard disk(Create a vitual hard disk now) >> Hard disk type (VDI) >> Dynamically allocated >> Chọn dung lượng (16GB vs Windows 10).
Bước 3: Tinh chỉnh và loại bỏ các thứ không cần thiết
- System: số nhân CPU
- Storage: Chọn file iso windows + add thêm ổ đĩa và chọn file iso drive
Bước 4: Start và cài windows như bình thường
- Custom
- Load drive
- Check load bỏ ở Checkbox: Hide drives that…
- Nhấn giữ Ctrl + chọn drive windows tương ứng
- Load lại drive và vào thư mục NetKVMwinXXamd64 – chọn amd64 bấm Next
- Ctrl + A để chọn 2 drive rồi bấm Next Next và chờ cài đặt
- Cài User + password >> next…
Bước 5: Vào window thì bạn cần bật Remote Desktop
- Start > Setting > System > Remote Desktop – Enable Remote Desktop
- Advanced Setting > Bỏ checkbox ở ô Require computers to use….
Bước 6: Vào run và nhập
secpol.msc
.. Nhấp ok
- Chọn mục: Local Policies > Security Options
- Kéo xuống và chọn dòng có chử …Ctrl + Alt + Del
- Nhấp đúp chuột và chọn Enable > OK
Bước 7: Cài các phần mềm cần thiết như Google Chorme… Chỉnh lại Power & Sleep và các thứ cần thiết khác.
Bước 8: Chuyển đuôi file WindowsXX.vdi thành WindowsXX.img
- Tắt máy ảo > Tùy chọn: Power off the machine
- Vào Star và CMD
- Nhập
cd C:\Program Files\Oracle\VirtualBox
- Nhập
VBoxManage.exe clonehd "Đường_dẫn_file_WindowsXX.vdi" Đường_dẫn_lưu_file_WindowsXX.img --format raw
(chọn và kéo file vào CMD để lấy đường dẫn cho nhanh nhé).
Ví dụ như đường dẫn mình cài theo mặc định thì:
VBoxManage.exe clonehd "C:\VirtualBox\Windows10\Windows10.vdi" C:\VirtualBox\Windows10\Windows10.img --format raw - Enter >> Chờ chạy xong
Bước 9: Đóng gói file thành gz
- Nén GZ file WindowXX.img bằng 7-zip.
Share File IMG Windows.GZ – hoanggiangnam.com
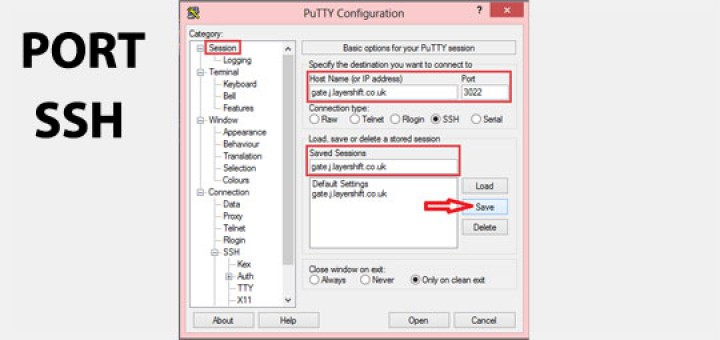
Lệnh cài đặt VPS cho Linode:
wget -O- --no-check-certificate Link-file.GZ | gunzip | dd of=/dev/sda
Note: thay Link-file.GZ bằng link bên dưới.
Ví dụ:
wget -O- --no-check-certificate https://hoanggiangnam.com/windows/Windows2022.gz | gunzip | dd of=/dev/sda
wget -O- --no-check-certificate https://hoanggiangnam.com/windows/windows_10_ltsc.gz | gunzip | dd of=/dev/sda
File IMG để upload vào Digitalocean
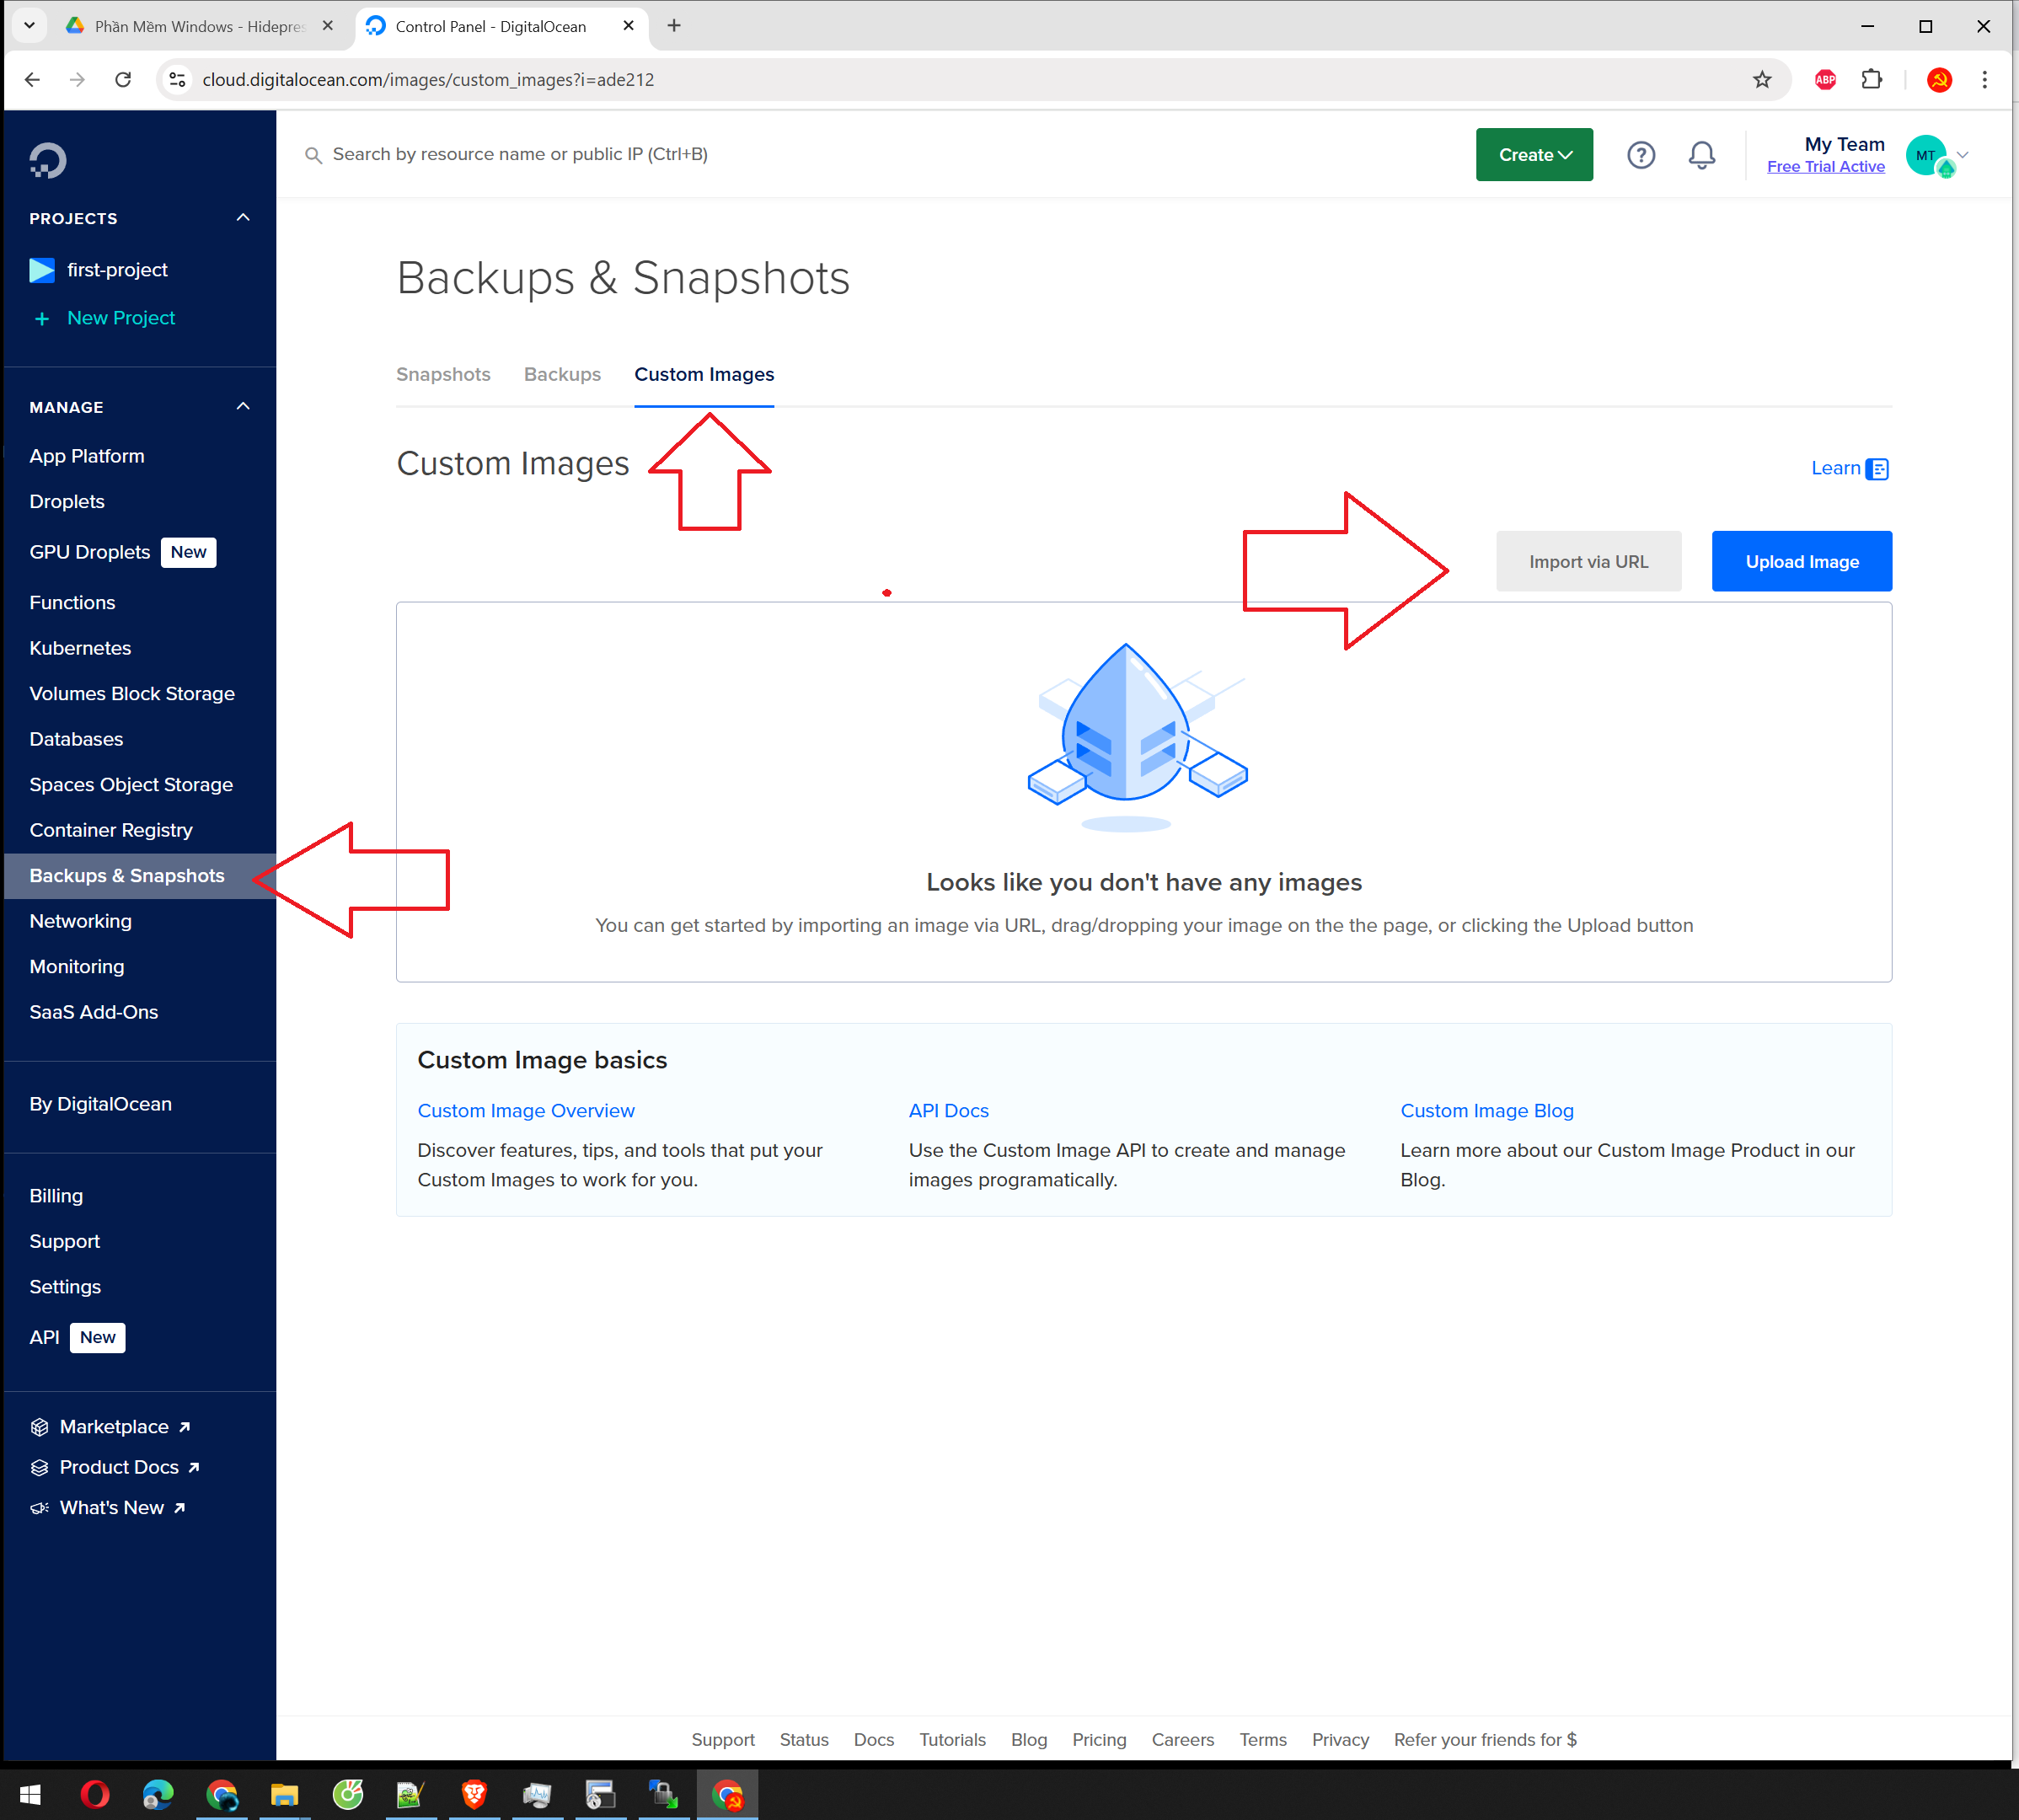
https://hoanggiangnam.com/windows/windows_10_ltsc.gz
Thông tin đăng nhập:
User: admin
Password: 1


