Thứ Ba, 10/06/2025
Loading...
  • Login
Hoàng Giang Nam Blog
  • Home
  • WordPress
    • WordPress
    • Woocommerce
  • Windows
  • Office
  • Phần Mềm
  • Thủ thuật
  • Linux
    • Ubuntu
    • CentOS
    • VPS – Server
    • Web Server
No Result
View All Result
Hoàng Giang Nam Blog
  • Home
  • WordPress
    • WordPress
    • Woocommerce
  • Windows
  • Office
  • Phần Mềm
  • Thủ thuật
  • Linux
    • Ubuntu
    • CentOS
    • VPS – Server
    • Web Server
No Result
View All Result
  • Login
Hoàng Giang Nam Blog
No Result
View All Result
Home Web Server
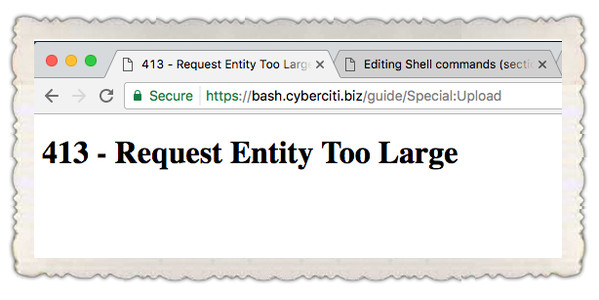
Nginx: 413 – Request Entity Too Large Error and Solution

Nginx: 413 – Request Entity Too Large Error and Solution

admin by admin
01/01/2025
Share on FacebookShare on Twitter

Mục lục

  1. Nginx configuration
  2. PHP configuration
  3. Chú ý đến lỗi quyền nữa

Cách fix lỗi Nginx: 413 – Request Entity Too Large 

Nginx configuration

Thêm dòng bên dưới vào sudo nano /etc/nginx/nginx.conf

# set client body size to 2000M
client_max_body_size 2000M;


service nginx reload

PHP configuration

vào /etc/php/7.4/fpm để sửa php.ini nhớ chỉnh lại phiên bản cho phù hợp.

sudo nano /etc/php/7.4/fpm/php.ini

; This sets the maximum amount of memory in bytes that a script is allowed to allocate
memory_limit = 1024M

; The maximum size of an uploaded file
upload_max_filesize = 2M

; Sets max size of post data allowed. This setting also affects file upload. 
; To upload large files, this value must be larger than upload_max_filesize
post_max_size = 3M

lưu và khởi động lại php

sudo systemctl restart php-fpm
## OR ##
sudo systemctl restart php7.4-fpm.service
## OR ##
sudo /usr/local/etc/rc.d/php-fpm restart

Chú ý đến lỗi quyền nữa

Ngoài việc thiết lập Nginx và PHP, bạn cần chú ý đến các lỗi cấp quyền đối với tệp. Thường đăng nhập vào tệp nhật ký lỗi máy chủ web của bạn. Đây là lỗi mẫu khi đăng nhập vào máy chủ web lighttpd của tôi:

Để khắc phục điều này, bạn cần thiết lập quyền chính xác bằng cách sử dụng lệnh chmod hoặc lệnh chown:

sudo chown -R lighttpd:lighttpd /var/cache/lighttpd/

Tags: Nginx
admin

admin

Next Post
Hướng dẫn cách cài đặt LAMP trên Ubuntu

Hướng dẫn cách cài đặt LAMP trên Ubuntu

Please login to join discussion

Recommended.

Cách ẩn logo reCAPTCHA Google

Cách ẩn logo reCAPTCHA Google

18/12/2024
Nginx: 413 – Request Entity Too Large Error and Solution

Nginx: 413 – Request Entity Too Large Error and Solution

01/01/2025

Trending.

HuananZhi X79 / X99 Motherboard BIOS POST codes

HuananZhi X79 / X99 Motherboard BIOS POST codes

01/01/2025
Tạo file IMG Windows.GZ bằng VM VirtualBox để cài đặt trên VPS Digitalocean, Linode

Tạo file IMG Windows.GZ bằng VM VirtualBox để cài đặt trên VPS Digitalocean, Linode

31/12/2024
Hướng dẫn lấy Client ID + Client Secret + Refresh Token Google Drive API

Hướng dẫn lấy Client ID + Client Secret + Refresh Token Google Drive API

19/12/2024
Cài đặt AApanel & TOR network

Cài đặt AApanel & TOR network

01/01/2025
Sử dụng Nginx làm Reverse Proxy cho nhiều trang web

Sử dụng Nginx làm Reverse Proxy cho nhiều trang web

18/12/2024
Hoàng Giang Nam

Blog chia sẽ kiến thức lập trình, source code, themes, plugin, phần mềm & thủ thuật máy tính...

Follow Us

Danh mục

  • CentOS
  • Chung
  • Server Email
  • Thủ thuật máy tính
  • Ubuntu
  • VPS – Server
  • Web Server
  • Windows
  • Woocommerce
  • Wordpress

Recent News

Disable Web Search Results in Windows 10/11 Start Menu

16/01/2025
Hướng dẫn lấy Client ID + Client Secret + Refresh Token Google Drive API

Hướng dẫn lấy Client ID + Client Secret + Refresh Token Google Drive API

19/12/2024
  • About
  • Advertise
  • Privacy & Policy
  • Contact

© 2024 Hoanggiangnam.com

No Result
View All Result
  • Home
  • Phần Mềm
  • Thủ thuật máy tính
  • WordPress
  • Ubuntu
  • Office
  • Photography
  • Windows

© 2024 Hoanggiangnam.com

Welcome Back!

Login to your account below

Forgotten Password?

Retrieve your password

Please enter your username or email address to reset your password.

Log In
Click to Copy